

In today’s digital age, having a website is essential for any business or personal brand. Nearly 6 billion people worldwide use the internet in 2026, about three-quarters of the global population. From mobile devices to desktops, everyone is online, and if your venture isn’t on the web, you’re missing out on countless potential visitors or customers. A website lets you showcase your products or services, establish credibility in your industry, generate leads, and give your brand the visibility it deserves. But beyond simply having a site, building one that suits your needs and is user-friendly is the ultimate goal.
Whether you plan to start a blog, launch an online store, or create a portfolio, this complete guide will walk you through how to create a website step by step. We’ll cover everything from planning and domain names to design, hosting, and ongoing maintenance. Let’s dive in!
1. Plan the Purpose and Goals of Your Website

Like any large project, building a website starts with careful planning. Before you jump into design or picking a platform, take time to define why you’re creating the site and who it’s for. Clarifying the purpose will guide all your decisions later on.
- Define the website’s purpose: What type of site will it be? It could be a simple blog sharing your expertise, a business website advertising your services, an e-commerce site selling products, a portfolio to showcase your work, or a community forum. Knowing the primary purpose early helps determine the features and structure you’ll need. For example, an online store will require product pages and a shopping cart, while a portfolio site might focus on image galleries.
- Establish concrete goals: Ask yourself what you want the website to accomplish. Instead of a vague goal like “I want a million visitors,” set realistic, measurable objectives that align with your business mission. For instance, you might aim for “500 site visits per month in the first 6 months” or “drive 50 online inquiries in the first quarter.” Measurable goals give you a benchmark to track success. Keep goals attainable and time-bound (e.g. “increase newsletter signups by 20% in 3 months”). You can always expand goals later, but starting with achievable targets will keep you motivated. There’s merit in dreaming big, but setting overly lofty goals too soon can lead to frustration. Break big goals into smaller steps so you can celebrate progress along the way.
- Identify your target audience and brand: It’s tempting to say your site is “for everyone,” but effective websites speak to a specific audience. Consider who your ideal visitors or customers are. What are their demographics and needs? Tailor your content and tone to resonate with them. For example, a law firm’s website will sound more formal and authoritative, while a site for a kids’ toy store can be playful and fun. Defining your brand personality (humorous, professional, compassionate, edgy, etc.) will help create a consistent voice across the site. You’re better off being meaningful to your niche than trying to please all 6 billion internet users. Focus on carving out an identity that your target audience will relate to and remember.
- Research competitors: Spend time looking at other websites in your industry or niche. What are they doing well? Where do they fall short? Competitor research is crucial for identifying gaps or opportunities. Analyze their design, content strategy, pricing or product offerings, and unique value propositions. This can inspire you and also highlight how you can differentiate. For example, if competitors’ sites all look cluttered, you can make yours clean and modern. If they lack a certain feature (like online appointment booking or a portfolio section), including it could give you an edge. Learn from their strengths and avoid their weaknesses. The goal isn’t to copy, but to find a unique angle for your own site that sets you apart in the market.
By nailing down your site’s purpose, goals, audience, and competitive landscape, you’ll be well-equipped to build a website that’s strategically aligned with your needs. Planning may not be the most exciting part, but it lays the foundation for everything that follows.
2. Pick a Memorable Domain Name
Your domain name is your website’s address on the internet (e.g. YourSiteName.com). It’s a key part of your brand identity and will be how people find and refer to your site. Take time to choose a domain that is catchy, meaningful, and represents your business well.
Characteristics of a good domain name:
- Short and memorable: In general, simple is best. Aim for a domain that’s brief, easy to spell, and easy to say. One or two words is ideal if you can manage. A short, unique name (think Google.com or Amazon.com) is more powerful and memorable than a long, generic phrase. Try to keep it under 15 characters if possible. Long or complicated names are harder for users to remember and increase the chance of typos.
- Avoid hyphens and numbers: Steer clear of using hyphens (-), numbers, or odd spellings in your domain. They often look unprofessional and can be confusing. As one expert put it, “Avoid hyphens and numbers: They are hard to communicate verbally, easily forgotten, and often look less professional.” For example, a domain like “Best-Cars-4-U.com” is problematic, as users might forget the hyphens or type “4” as “four.” It’s safer to stick with letters and make the name one continuous string.
- Reflect your brand or topic: Ideally, the domain name should give a hint of what your site is about or include your brand name. If your business name is unique, that’s often the best choice (e.g. NovusMedia.com for a company named Novus Media). If the exact name is not available, consider adding a keyword or location. For instance, “NovusMediaDesign.com” or “NovusMediaUS.com”. This can help with recognition and even SEO (search engines get a clue from your domain keywords). However, avoid being too generic or keyword-stuffed (like BestNewYorkPlumberBlog.com); you want something brandable that doesn’t sound like a spammy exact-match domain.
- Choose the right extension: Domain names have extensions (also known as TLDs, top-level domains) such as .com, .net, .org, .io, .shop, etc. The classic .com is still the most popular and credible in most cases. People instinctively type “.com” and many smartphone keyboards even have a “.com” button. If possible, get the .com for your name. However, if you have a specific reason, other extensions can work: .org for nonprofits, country-specific TLDs like .co.uk or .de if you serve only that country, or niche extensions (.io for tech, .design for a design portfolio, etc.). Newer fun extensions (like .pizza or .blog) exist, but use with caution, they may not be as universally trusted. If your perfect name is taken on .com, you might consider an alternative extension only if it still fits your brand. Always double-check that the name isn’t trademarked by someone else, to avoid legal issues down the line.
- Check availability and act fast: Use a domain search tool (such as GoDaddy) to see which names are open. Good names get snapped up quickly, so once you find one you love, register it right away. Domain registration is relatively inexpensive, typically around $10–20 per year for a standard .com. If you’re not ready to build the site yet, you can still register the domain now so that it’s yours when you need it. It’s a small investment to secure your brand’s online address. You might also buy common misspellings or variations of your name to prevent others from using them. For example, Facebook also owns FB.com and Google owns Google.net, etc., which redirect to the main site.
Pro Tip: Owning your brand online is important, but it doesn’t have to break the bank. Most new domains are fairly cheap (often under $15 for the first year). However, if you’re eyeing a very premium or previously owned name, the price could be higher. For instance, Cars.com famously sold for millions. Don’t worry, you don’t need a premium name to succeed. Plenty of businesses thrive with creative, made-up names. Just make sure your choice is unique, not easily confused with existing sites, and represents your business well. Before finalizing, also check that the corresponding social media handles are available (it’s ideal if you can have the same name on LinkedIn, Instagram, etc.). And remember, your domain is a long-term asset; it will appear on business cards, in Google results, and be passed by word of mouth, so choose one that you’ll be happy with for years to come.
Once you’ve registered your domain (providers like GoDaddy, Namecheap, Squarespace, etc. can do this), you’re ready for the next step. If you aren’t building the website immediately, you can simply hold onto the domain or “park” it. But ideally, you’ll move on to connecting it with a website so you can start putting it to work!
3. Choose a Reliable Web Hosting Plan

Every website needs a web hosting service, this is the server where your website’s files, databases, and content live, making it accessible to users 24/7. Think of your domain as the address and your hosting as the actual building (server) at that address. Choosing the right hosting plan is crucial, as it affects your site’s performance, security, and reliability.
When selecting hosting, consider your website’s size, traffic expectations, and technical needs. Here are the main types of hosting and what they mean:
- Shared Hosting: This is the most budget-friendly option and a great starting point for many small websites. In shared hosting, one server’s resources (CPU, memory, storage, bandwidth) are shared among many websites. It’s like living in an apartment building, you have your own space, but you share infrastructure with neighbors. Shared plans often cost just $3–$10 per month. The trade-off is that performance can be limited: if another site on your server suddenly gets a ton of traffic or uses a lot of resources, it may slow down your site too.
Advantages: very affordable, easy to set up, and maintenance of the server is handled by the host (you don’t need to be a tech expert).
Downsides: limited control over server settings, and not ideal for high-traffic or resource-intensive sites. Shared hosting works best for personal sites, blogs, or small business websites with modest traffic.
- VPS (Virtual Private Server) Hosting: A VPS is like an upgrade from shared hosting. The server is still shared, but in a much more isolated way. The host uses virtualization technology to give you a dedicated slice of the server’s resources that are reserved just for you. It’s analogous to moving from an apartment to a condo; you’re in the same building as others, but you have more control over your own unit. VPS plans typically cost more (say $20–$80/month) but offer better performance and flexibility. You get guaranteed amounts of CPU/RAM, and you can often configure the server more to your liking (even install custom software). This is great for growing sites that need more power or specific configurations, without the expense of a whole server. However, some VPS plans require a bit more technical management (unless it’s a “managed VPS” where the host helps maintain it). Choose VPS if your site is getting too big or slow for shared hosting, or if you anticipate spikes in traffic that you want to handle smoothly.
- Dedicated Server Hosting: With a dedicated plan, you rent an entire physical server all to yourself. This is like owning your own house; all resources are exclusively yours, so you have maximum performance and full control over setup. Dedicated servers are typically used by large websites or applications that get very high traffic (hundreds of thousands of visitors or more) or that need advanced security and custom server configurations (e.g. running specialized software, handling sensitive customer data). Expect costs in the range of $100+ per month (and it can go into several hundreds for high-end servers). While dedicated hosting offers top performance, it also demands technical know-how to manage the server (unless you pay extra for managed dedicated hosting). For most beginners, this is overkill, but it’s an option as your site scales up to enterprise levels.
- Cloud Hosting: In recent years, cloud hosting has become popular. It’s a bit different in that your site isn’t on one single server, but rather uses a cluster of servers (“the cloud”) working together. This allows for great scalability, resources can be adjusted on the fly, and if one server fails, another steps in, improving reliability. Pricing is often usage-based. Big cloud providers include Amazon Web Services (AWS), Google Cloud, Microsoft Azure, as well as many hosts offering cloud plans. For a small site, cloud hosting might be more powerful than you need, but for web apps or fluctuating traffic, it’s a fantastic solution. Many cloud hosts can also be configured to act like VPS or dedicated environments, but distributed across multiple machines.
- Managed WordPress Hosting: This is a specialized hosting type tailored for WordPress sites. Companies like WP Engine, Bluehost, SiteGround, and others offer plans where the servers are optimized for WordPress performance and security. They often include automatic updates for WordPress core and plugins, daily backups, built-in caching, and expert support for WordPress issues. Managed WP hosting can be on shared or cloud infrastructure behind the scenes, but the key is you don’t have to worry about the technical tuning, it’s “hands-off.” If you know you’ll use WordPress and want convenience, this is worth considering (though it’s a bit pricier than generic shared hosting).
Which hosting to choose? If you’re just starting out with a small website, shared hosting is usually sufficient and very cost-effective. You can always upgrade later as you grow. Many hosts will migrate you to a VPS or cloud plan when you need it. If you anticipate needing more control or have specific requirements (say, you need a certain software library installed on the server), a VPS might be worth it from the start. For a mission-critical large business site or an online store with heavy traffic, investing in dedicated or high-end cloud hosting could pay off for the performance gains.
No matter the type, here are some key hosting features to look for:
- Uptime and reliability: Look for hosts that guarantee at least 99.9% uptime. This means your site should only be down for at most a few minutes per month. Reputable hosts will often exceed this (99.99% uptime is about ~5 minutes downtime/month). Read reviews to ensure they deliver on their uptime promises. Frequent downtime can really hurt your traffic and credibility.
- Speed and bandwidth: In shared hosting, speed can vary, but choose a host known for solid performance. Many hosts use SSD storage and fast network connections. Bandwidth (how much data can be transferred) should be ample or “unmetered” for normal usage. If you plan to serve lots of videos or large files, make sure the plan supports that or consider a specialized service (like a video hosting platform or CDN). A fast-loading site is crucial, as users will leave if pages take too long.
- Storage: Ensure the plan offers enough disk space for your site content. Simple sites won’t need much space (a few GB is plenty for thousands of pages of text and images). But if you host lots of high-resolution images, videos, or allow user uploads, storage adds up. Some budget plans cap storage at say 5GB or 10GB – which may be fine initially, but check that you can upgrade easily if needed.
- Security features: Your host should at minimum provide a free SSL certificate (so your site can run on HTTPS, most do this via Let’s Encrypt now), and ideally things like firewall protection, malware scanning, and DDoS protection. Many hosts have security systems that monitor and block common threats. Automated backups are another huge plus, look for hosts that back up your site daily or weekly so you can restore it if something goes wrong. You hope to never need it, but it’s insurance. Some plans even include advanced security add-ons or hack cleanup services.
- Customer support: When your website is live, any issue can be urgent. Look for a host that offers 24/7 support via multiple channels (at least live chat or phone, in addition to email tickets). Test their support if you can, for instance, send a question before you sign up to see how responsive and helpful they are. Good support can save you hours of headache, especially if you’re not extremely tech-savvy.
- Scalability: If all goes well, your website will grow and attract more visitors. Make sure your host has easy upgrade paths. You should be able to move from a shared plan to a higher tier or to a VPS/cloud without a ton of downtime or hassle. Many hosts will handle the migration for you. Also check for things like the ability to host multiple websites on one account if you plan on that.
- Pricing and terms: Compare intro prices vs renewal prices. It’s common for hosts to offer a big discount for the first term (like first year at $3/mo) then renew at a higher rate (say $8/mo). That’s not necessarily a deal-breaker, but be aware of the long-term cost. Also see if they offer any domain incentives (some give a free domain for a year with a hosting purchase) and how their refund policy looks (30-day money-back guarantee is standard with many, useful if you change your mind).
Tip: Many all-in-one website builder services (like Webflow or Framer, etc.) include hosting as part of the package, so you don’t need separate hosting in those cases. However, if you opt for a CMS like WordPress or you’re coding a site yourself, you will need to get a hosting plan. Some providers (e.g., GoDaddy, Bluehost, etc.) offer bundle deals with domain + hosting + email all together, which can simplify setup for beginners. At Ramonda Digital, our website packages also include hosting, along with everything our clients need to launch smoothly.
In summary, choose a hosting plan that fits your current needs but can grow with you. For most new sites, a reputable shared host is a great starting point. As your traffic and content expand, you can step up to VPS, cloud, or dedicated hosting. The key is to go with a trusted hosting provider that keeps your site fast, secure, and online consistently. With your domain and hosting in place, you’ve secured your site’s address and home. Next, it’s time to actually build the website!
4. Select a Website Building Platform or Tool
Now that you have a domain and hosting, it’s time to bring your site to life. To do that, you’ll need a tool that lets you actually build the pages your visitors will see. Most people go one of three routes:
1. Use a drag-and-drop website builder (no coding needed)
2. Use a Content Management System (CMS) like Webflow or WordPress
3. Hire a professional to build it for you
Let’s go over each of these, so you can pick what works best for your needs and skills.
Option 1: Website Builders (No-Code Tools)
Website builders are perfect for beginners and small businesses that want to get online fast without writing code. You use visual editors to place text, images, forms, and more. These platforms handle the design and the code behind the scenes.
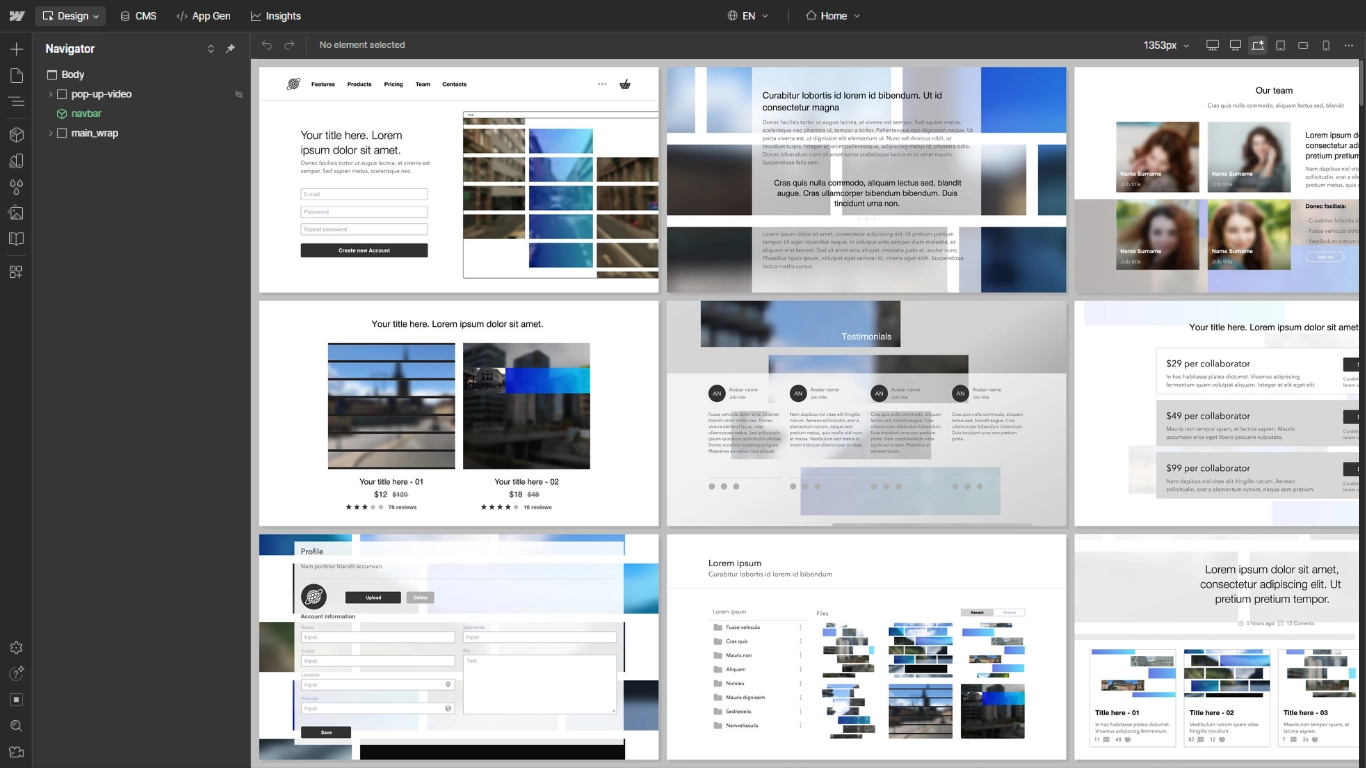
There are many tools in this category, but the one we recommend most often is Webflow. It's powerful enough for pros but still friendly enough for ambitious beginners. It lets you build pixel-perfect layouts and even includes a built-in CMS for managing dynamic content, which means you can design and update blog posts, portfolios, projects, or products with ease.
Framer is another great builder for designers who want animations and interactivity, while tools like Wix and Squarespace are good for basic sites and quick templates.
Tip: Many site builders (like Webflow, Framer, Wix, Squarespace) include hosting as part of the package. You simply publish your site and connect your domain.
If you use Webflow for example, you get responsive design tools, hosting, animations, forms, CMS, and more, all in one workspace. And yes, we use it ourselves extensively.
Pros:
· No coding required
· Fast setup and publishing
· Built-in hosting and templates
· Great for small businesses, portfolios, service websites, landing pages, and more
Cons:
· Monthly/annual fees
· Slight learning curve (especially with Webflow)
· In very unique scenarios, hand-coding is still needed
Option 2: Use a CMS (Like Webflow or WordPress)
A Content Management System (CMS) lets you manage and publish content easily. If you're blogging, showcasing projects, or updating content regularly – this is the way to go.
Webflow stands out again here because it’s both a builder and a CMS. You get visual control over design plus the ability to create custom content types , think blog posts, team members, or case studies, and update them without touching code.
Of course, WordPress is the most widely used CMS in the world, and still a solid choice. It’s open source, has tons of plugins, and is extremely flexible. But it also requires maintenance: updates, backups, plugins, security. You’ll need separate hosting, and possibly developer help if something breaks.
Other CMS platforms include Joomla, Drupal, and various headless CMS options, but if you’re technical or have a specific need, Webflow or WordPress will cover most use cases.
Pros:
· Great for content-heavy websites
· Scalable and flexible
· Templates, plugins, and integrations
Cons:
· WordPress requires technical upkeep
· Can be overwhelming for beginners
· Design flexibility limited unless you know CSS or use premium themes/plugins
If you want flexibility with design and structured content, Webflow’s CMS gives you the best of both worlds, and you can still manage everything visually.
Option 3: Hire a Professional
If you don’t want to spend your own time building or learning platforms, you can always bring in help.
Working with an experienced web designer or agency gives you:
· A completely customized design based on your brand
· Guidance on content, layout, and structure
· Speed, performance, and SEO/AEO optimizations
· Ongoing support if something breaks or needs updates
We specialize in creating clean, fast, and conversion-focused websites, especially in Webflow. Whether you need a new site from scratch, a redesign, or help scaling an existing project, our team is here to make the process smooth and enjoyable.
We also include premium hosting, custom strategy, automation, and ongoing support as part of our web development packages.
You’ll save time, avoid costly mistakes, and get a result that reflects your business’s personality and goals.
No matter which route you take, building it yourself or hiring a pro, the most important part is to start. Pick a platform that fits your style and comfort level. Then move forward confidently knowing your online presence is about to get real.
5. Design and Build Your Website’s Pages
Now for the fun part, building your website’s look and feel, and adding content. This is where you transform your ideas into a functional, appealing site. While the exact steps will vary a bit depending on the platform you chose (Webflow vs WordPress vs others), the general principles are similar. We’ll outline the key steps and best practices in the site building process:
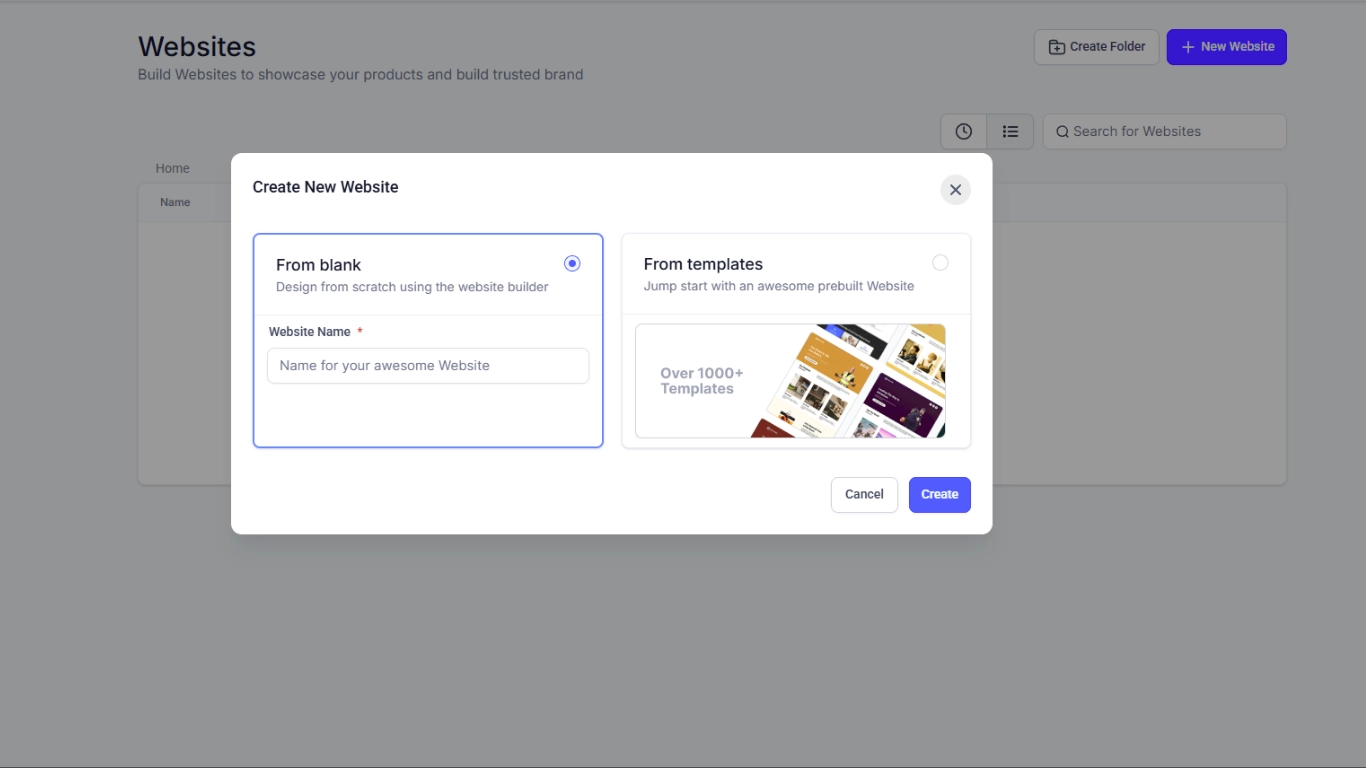
Choose a Template or Theme (Layout Design)
Unless you’re starting from a completely blank slate (which only advanced users on tools like Webflow/Framer might do), you’ll likely begin with a pre-designed template or theme. Templates give you a baseline design that you can then customize with your own text, images, and branding.
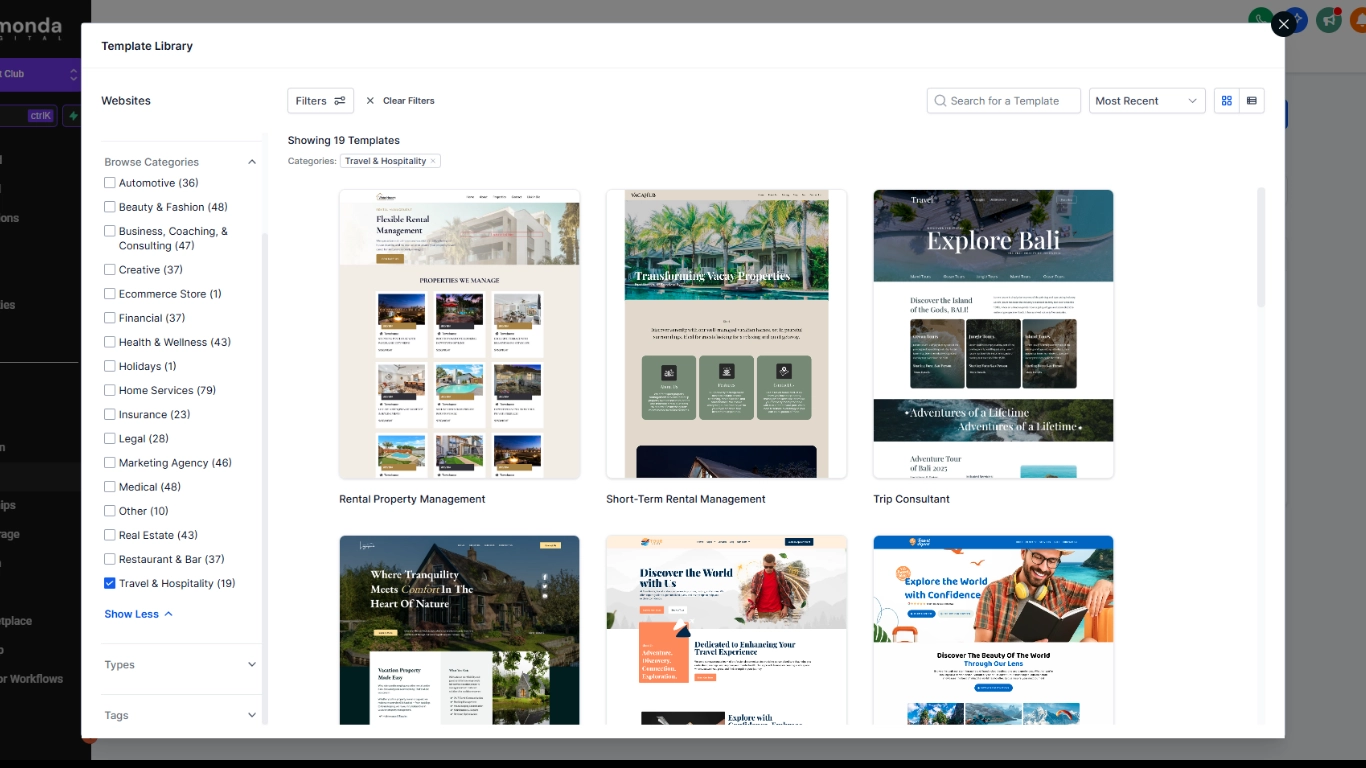
- Pick a template that fits your purpose and brand style. Website builders and CMS themes are often categorized by industry or site type (e.g. “Portfolio”, “Restaurant”, “Blog”, “Online Store”). Browse those categories for a design that resonates with the vibe you want. For example, if you’re an accountant, you might look for a clean, professional template with a neutral color scheme. A wedding photographer, on the other hand, might pick a more visually driven, elegant template. Most platforms let you preview templates. Pay attention to layout and navigation structure – does it have the sections you need (like a gallery, product grid, blog feed, etc.)?
- Responsive design: Ensure the theme is mobile-responsive (most modern ones are). This means the layout will automatically adjust to look good on smaller screens like smartphones and tablets. Given the majority of web traffic is on mobile these days, you want a site that looks great and is easy to navigate on a phone. Always test the template’s demo on your phone or resize your browser to simulate different screen sizes.
- Keep it simple and uncluttered: A good design is intuitive. Visitors should immediately understand how to find information. Avoid overly busy templates with too many elements competing for attention. Clear menus, ample white space, and legible text go a long way. You can always add your flair with images and color, but the underlying structure should be user-friendly.
Don’t worry if a template isn’t exactly perfect; you will be replacing content and possibly hiding sections you don’t need. Choose one that’s close enough and has the overall style you like.
Customize Your Style: Colors, Fonts, and Logo
Once the base design is in place, it’s time to brand the site with your own colors, typography, and logo so it becomes uniquely yours.
- Color scheme: Most templates allow you to change the primary colors. Stick to a palette of about 2 or 3 colors. Usually this includes a primary brand color (used for headers, highlights, buttons) and a secondary color or accent (used for maybe link hover states, minor accents), plus neutral backgrounds (white/gray) for the bulk of sections. When choosing colors, consider the psychology and contrast. For instance, blue tones often convey trust and professionalism (popular with tech and finance companies), whereas red can evoke excitement or urgency (common in sale banners or food industry). Ensure sufficient contrast between text and background. Black or dark gray text on a white/light background is most readable for body text. Avoid combinations that strain the eyes (like yellow text on white, or light gray on light gray). Use bright colors sparingly for calls-to-action or important highlights so they draw attention. If you have an existing logo or brand, pull colors from there to integrate. If not, many template editors even suggest predefined palettes that work well together.
- Typography (fonts): Limit your site to 1 or 2 fonts. Using too many fonts can look inconsistent and unprofessional. For content readability, sans-serif fonts (like Arial, Helvetica, Open Sans) are very common on screens for paragraph text. They’re clean and easy to read at various sizes. Serif fonts (like Times, Georgia) can be nice for headings or a more formal vibe, but on lower resolution screens small serif text can be a bit harder to read. Many site builders and WordPress themes let you choose from Google Fonts, which are web-safe and load universally. Pick a font that matches your tone, e.g. a playful startup might use a rounded, friendly font, whereas a law firm would use a strong, classic font. Make sure it’s easily legible. Also, keep font sizing consistent, headings larger than body text, etc. You can usually adjust font sizes in the theme settings to ensure, say, your H1 titles aren’t too huge on mobile or such.
- Logo and branding elements: If you have a logo, definitely incorporate it (usually in the site’s header). Place it top-left typically, as that’s where users expect to see branding. If you don’t have a logo yet, you could simply use a stylized text of your site name for now (many site builders have a text logo placeholder). There are also simple logo maker tools (Canva is probably the best option) where you can create a basic logo for free or cheap. A logo gives your site a professional touch and helps with brand recall. Keep it simple, it should be recognizable and clear even at smaller sizes (like on a mobile menu bar). Additionally, set a browser favicon (the little icon that appears on the browser tab), often this can be your logo mark or the first letter of your brand. It’s those little touches that make your site look polished.
As you apply your custom colors, fonts, and logo, your website will start to feel more like your brand rather than a generic template. Remember to maintain consistency, use the same style for buttons throughout, the same color for all headings of the same type, etc. Most templates enforce consistency automatically, but if you find yourself changing one page’s font color manually to something off-palette, step back and consider using the theme’s global settings to stay uniform.
Create the Essential Pages and Site Structure

Every effective website has a core set of pages that visitors expect to find. The exact pages you need will depend on your site’s purpose, but let’s go over the common pages and what to put on each:
· Homepage: This is your main landing page, the first impression for many visitors. It should clearly convey who you are and what you offer within seconds. Remember, you have only a few seconds to grab attention. Research shows you have under 10 seconds to communicate your value proposition before visitors decide to stay or leave. So your homepage should have a concise headline and tagline that sums up your business, along with an inviting design. Make it clear and compelling. Highlight your primary call-to-action here (e.g., “Sign Up,” “Shop Now,” “Contact Us”) and give a snapshot of what’s inside the site. Think of the homepage as the virtual lobby of your business; it should be welcoming and informative about your key value.
· About Us: This page tells the story behind your business or project. People love to know who they’re dealing with. Use the About page to build trust and connection. Share a brief history, your mission or values, and introduce the team if applicable. Showing the human side of your brand is important. Including photos of you/your team, or your workspace can personalize this page. Keep the tone authentic; explain what makes you passionate about what you do or what sets you apart.
· Products/Services: If you are selling something or offering services, you need a page (or section of pages) dedicated to what you offer. Clearly list your products or services, with names and brief descriptions for each category or item. You might have a top-level “Products” page that links to individual product pages, or a “Services” page listing all services. Emphasize benefits and what problems you solve for the customer, not just features. If possible, include high-quality photos of products or examples of your work. For each product/service, detail enough information (and possibly pricing) for a customer to make a decision. Remember to organize this information in a logical way (by category, etc.) so users can easily find what they’re looking for.
· Testimonials/Reviews: Social proof can greatly increase credibility. Having a Testimonials or Reviews page where you showcase quotes from happy customers or clients is highly recommended (if you’re just starting and don’t have any yet, you can omit this until you gather some). When adding testimonials, include the person’s name and maybe their company or location, to lend authenticity. For example: “Jane Smith, CEO of XYZ Corp, says: Amazing service and quality!”. If relevant, you could even embed reviews from Google, Yelp, or Facebook. If you have case studies or success stories, those can fit here too. Real feedback reassures new visitors that you deliver on your promises.
· Contact Us: This is one of the most vital pages. It tells visitors how to get in touch or take the next step. Your Contact page should be easy to find (often linked in the main menu and definitely in the footer). On this page, provide all relevant contact info: business phone number, email address, physical address if applicable, and possibly a contact form for convenience. If you have a physical store or office, include a map (many site builders allow embedding Google Maps) and mention your operating hours. Also, encourage people to connect via social media by providing your social media profile links. Essentially, make it as straightforward as possible for someone to reach you. Ensure no one has to hunt around to find your contact details.
In addition to these, other pages/sections you might include:
· Blog or Resources: If you plan to produce content regularly (articles, news, tutorials), having a Blog section is great. Regularly updated blog content can showcase your expertise and also help with SEO (more on that later). It’s also a way to engage your audience and keep them coming back. Many small businesses maintain a blog to share updates, how-to guides, or industry insights. As mentioned earlier, a blog can help position you as a thought leader and improve search rankings by keeping your site fresh.
· FAQ: Frequently Asked Questions can be very useful if your customers often have similar queries. On an FAQ page, you can address common questions about your products, services, or policies. This not only saves time by preemptively answering inquiries, but can also overcome objections for potential customers. Keep FAQs honest and positive, and update them as new questions arise.
· Portfolio or Gallery: If you’re an artist, designer, or your work is visual, a portfolio page to showcase examples is key. Even if not, case studies or a gallery of past projects can strengthen your credibility.
· Policy pages: Don’t forget the less exciting but necessary pages if applicable, e.g., Privacy Policy, Terms of Service (especially if you collect user data or run an e-commerce, these might be required by law or third-party services). If you run an online store, also include pages like Shipping Policy, Return/Refund Policy, etc., typically linked in the footer.
After deciding the pages, think about the navigation menu structure. Usually, you’ll have a top menu listing the main pages (Home, About, Services, Contact, etc.). Keep navigation labels clear and intuitive. You might use dropdowns if you have subpages (for example, under Products, a dropdown for different product categories). The goal is to make it easy for users to find info. A simple, logical menu improves user experience and helps search engines understand your site.
Add Images and Media Wisely
Images can make a website come alive. They add visual appeal and can convey messages faster than text. However, it’s important to use images correctly:
- Use high-quality, relevant images: Blurry or pixelated photos will turn off visitors. Use sharp, well-lit images. If you have actual photos of your products, office, team, or work, those are gold, they make your site feel authentic. If not, you can use stock images as placeholders, but choose ones that match your content and feel genuine (stock imagery has gotten much better over the years; sites like Unsplash, Pexels, Pixabay offer free high-quality photos). For example, if your site is about fitness coaching, include images of people exercising or healthy lifestyle scenes.
- Legal usage: Very important, do not just grab images from a Google search or another site, as they might be copyrighted. Stick to images you have rights to: either your own photos, images in the public domain, Creative Commons images with appropriate attribution, or stock images licensed for use. There are plenty of resources for free photos that don’t require attribution (Unsplash etc.), or you can pay for stock photos from libraries like Shutterstock, Adobe Stock for more variety. If using Creative Commons images, make sure to credit the photographer as required (usually in a caption or on a credits page).
- Optimize image file sizes: Large images can slow down your site significantly. Before uploading, resize the image to the actual display dimensions needed. For instance, don’t upload a 4000px wide image if it’s only going to be shown as 800px on the site. Also compress the images; tools like Squoosh or the built-in image optimizers can reduce file size without noticeable quality loss. Many CMS or builders will do some optimization automatically, but it’s good practice to handle it upfront too. As a rule of thumb, try to keep images under 200 KB each (much less for smaller ones). Your pages will load faster, which means users won’t get frustrated and leave, and it’s also good for SEO.
- Use descriptive filenames and ALT text: When you add an image, give it a descriptive alt attribute (alternative text) describing what the image is. This is important for accessibility (visually impaired users using screen readers will hear the alt text) and also gives search engines context about the image. For example: <img src="team-photo.jpg" alt="Our company team of 5 people smiling at the office">. Similarly, name the file something sensible rather than a random string. This can very slightly help SEO (e.g. sydney-plumber-van.jpg is better than IMG12345.jpg if the image is a plumber’s van in Sydney for a plumbing service site).
- Consider placement and quantity: Use at least a few images to break up text and showcase your offerings, but don’t go overboard such that pages become heavy or overly busy. A common approach: a big hero image or banner at the top of the home page, images for each major section or product, and perhaps some icons or graphics to illustrate points. Balance visuals with text for a pleasing layout.
- Multimedia (video, audio): If relevant, embedding video or audio can enrich a site. For example, a video intro or a product demo can boost engagement. Just be mindful of performance; it’s often best to host videos on platforms like YouTube/Vimeo and embed them, rather than directly uploading a massive video file to your site host. That way, those platforms handle the streaming efficiently. Make sure any auto-play media is muted by default; surprising a user with loud audio is a no-no.
To sum up, images should enhance your content, not distract or slow it down. Quality over quantity. And always ensure you have the rights to use an image – when in doubt, there are plenty of free-to-use sources out there.
Craft Your Website’s Content (Copywriting)
The words on your website, known as the copywriting or copy, are what ultimately inform and persuade your visitors. This includes everything from headlines and button text to the detailed descriptions on your pages. Here are some tips for writing effective web content:
- Write for your audience: Use language and references that your target visitors will understand. If your audience isn’t tech-savvy, avoid jargon. If they’re industry experts, you can use the appropriate terminology. The tone can be conversational for a personal blog, enthusiastic for a creative business, or formal for a corporate site. Match it to what your audience would expect and trust.
- Be clear and concise: Web readers have short attention spans. Get to the point quickly. Make sure your key message is conveyed in the first few sentences of each section. Use short paragraphs (3-5 sentences max, as we’re doing here) and break up long blocks of text with subheadings or bullet points. This not only helps readability but also allows someone scanning to pick up the gist.
- Highlight benefits and outcomes: Especially in marketing copy (like on a services or product page), focus on how you solve the user’s problem or fulfill a need. It’s easy to fall into just listing features (“We offer 10 training modules and certificate on completion…”), but pair features with benefits (“Our 10 comprehensive training modules will take you from beginner to job-ready, and you’ll earn a certificate to boost your resume at the end”). Essentially, answer the visitor’s implicit question: “What’s in it for me?”
- Calls to Action (CTA): We mentioned CTAs on the home page, but ensure every page has a logical next step for the user. It could be a button to contact you, a link to sign up, or even a suggestion to read another article. Don’t leave users at a dead end. For instance, after describing your services, you might have “Ready to get started? Contact us for a free consultation →”. Make CTAs stand out visually (buttons or bold text) and use action verbs (“Download Guide”, “Subscribe Now”, “View Portfolio”).
- Maintain consistency: Use a consistent voice throughout the site. If you refer to yourself as “we” in one place, don’t switch to “I” elsewhere unless necessary (this depends on if your brand is just you or a team). Keep formatting of similar elements consistent (e.g., all your product descriptions might follow a similar structure). Consistency builds a cohesive brand impression.
- Proofread everything: Spelling mistakes or grammatical errors can undermine the professionalism you’re aiming for. Use a spell-check tool, read your text aloud to catch awkward phrasing, or have someone else review it. It’s often hard to see our own mistakes, so a fresh pair of eyes (a friend or colleague) can be valuable. Also check that all your facts and details (like pricing, contact info, stats) are accurate and up to date.
- SEO considerations: We’ll talk more about SEO in the next section, but as you write content, it doesn’t hurt to naturally incorporate relevant keywords (search terms) people might use to find a site like yours. For example, if you provide plumbing services in Chicago, mentioning “plumber in Chicago” or “Chicago plumbing company” in your copy in a natural way can help search engines understand your relevance. Just don’t overstuff keywords or write for Google at the expense of human readability. A rule of thumb: write primarily for people (make it helpful and engaging), and secondarily tweak for search-friendliness.
- Show personality where appropriate: Especially on pages like About or your blog, don’t be afraid to let your unique personality or brand voice shine. People appreciate authenticity and it differentiates you. A bit of humor or a personal anecdote can make your content more memorable, as long as it’s in line with your brand image. For instance, a fun boutique might have playful copy (“Our Story – It all started with a latte and a crazy idea...”), whereas a cybersecurity firm would maintain a more serious, expert tone.
Remember, content is not set in stone. You can (and should) update your website’s copy over time, to reflect new offerings, to refine messaging as you learn what resonates, or to keep information current. A website is an evolving representation of your brand or project.
At this stage, you’ve chosen your site builder or CMS, applied a template/design, and filled in all your pages with custom content and images. You’ve essentially built the website! Congrats, that’s a big chunk of work. But before you shout “done” and share it with the world, there are a few crucial steps left: optimizing for search engines, thoroughly testing everything, launching, and then maintaining it going forward. We’ll cover those next.
6. Optimize Your Website for Search Engines (SEO)
The internet is a vast ocean, and without some SEO (Search Engine Optimization) work, your site might be a tiny uncharted island. SEO is the practice of optimizing your website to increase its visibility in search engine results (primarily Google, but also Bing, etc.) for relevant queries.
But classic SEO is just part of the story. If you want to stay competitive in 2026 and beyond, it’s also important to consider how AI-driven search is evolving, think AEO (Answer Engine Optimization) and GEO (Generative Engine Optimization).
However, we won’t dive into those in this post. If you're curious how they differ from traditional SEO and why they matter, check out our dedicated guide here.
While SEO can get very complex, basic on-page SEO is something every website owner can and should do. Here are the key aspects:
- Keyword research and usage: Think about the words or phrases people might type into Google when looking for what your site offers. These are your “keywords” (which can be single words or, more often, phrases). For example, if you run a local bakery in Boston, potential search terms might be “best cupcakes in Boston” or “custom birthday cakes Boston”. Once you identify these, incorporate them naturally into your page titles, headings, and content. Each page of your site can target a set of related keywords. For instance, your Services page might emphasize “wedding photography in Dallas” if that’s what you do. Longer, specific phrases (long-tail keywords) often have less competition and can be easier to rank for, plus they may catch people later in the buying cycle. (It’s easier to rank for “affordable wedding photographer Dallas” than for just “wedding photographer”.) However, avoid “keyword stuffing” (repeating terms unnaturally). Google’s algorithms are smart and will penalize that. Content should always read well for humans first.
- Page titles and meta descriptions: These are the title and snippet that show up in search results. In your site builder or CMS, you should set an SEO title and meta description for each page. The title tag (often the same as your page’s main heading) should be concise (50-60 characters) and include the page’s primary keyword and your brand name. E.g. “Custom Cakes in Boston – SweetTooth Bakery”. The meta description is a 150-160 character summary that can entice users to click: e.g. “SweetTooth Bakery creates delicious custom cakes and cupcakes in Boston for all occasions. Visit our site to see our flavors and place an order!” While meta descriptions aren’t a ranking factor directly, a good one can improve click-through rates.
- Headings structure: Use proper heading tags (<h1>, <h2>, <h3>...) in your content to create a logical hierarchy. The main page title is usually an <h1>, and sub-sections use <h2> and so forth. Not only does this help human readers skim, but search engines use headings to understand the content structure and importance. For example, on a blog post, your <h1> might be the post title “10 Tips for Growing Tomatoes”, and then <h2> for each sub-tip section, etc. Include keywords in some headings where relevant, but again, only if it makes sense.
- URL structure: If you can control your URLs, make them clean and descriptive. Instead of yourdomain.com/p?id=123, you’d want something like yourdomain.com/services or yourdomain.com/blog/growing-tomatoes-tips. Most modern site tools do this automatically or allow you to set a “slug” for the page URL. Use keywords in the URL if possible (e.g. include “tomatoes” in that blog post URL above). Shorter URLs are generally preferable.
- Internal linking: Within your site, link to your own pages when it’s helpful. For example, if you mention your “Portfolio” on the About page, make it a link to the portfolio page. Internal links help distribute “link equity” and also keep users engaged by guiding them to related info. Just don’t overdo it or force irrelevant links.
- Mobile optimization: Google predominantly uses mobile-first indexing, meaning it considers the mobile version of your site as the primary one. So, ensure your site works well on mobile, not just looks, but also performs. Most templates are responsive, but double-check that content isn’t cut off, buttons are easily tappable, and so on.
- Site speed: Page speed is a known ranking factor. Plus, users hate slow sites. We already covered compressing images. Other speed tips include: minimize use of heavy scripts or plugins, enable caching if your platform allows (many WordPress plugins like WP Rocket can do this, and some builders have it built-in), and possibly use a CDN (Content Delivery Network) if you have a global audience (services like Cloudflare have free plans that can cache your site globally and also provide security). Test your site on Google PageSpeed Insights or GTmetrix to see if there are bottlenecks and follow their recommendations if feasible.
- SSL (HTTPS): By now, all websites should be served over HTTPS (the padlock in the browser). This encrypts data between your site and users, and Google gives a slight ranking boost to HTTPS sites (and marks non-HTTPS sites as “Not secure” in Chrome, which can scare users). Most hosts offer a free SSL certificate (often via Let’s Encrypt). Make sure to enable that and ensure your site URLs redirect to https://. This might have been done automatically when you set up hosting or your builder, but double-check your site URL starts with https.
- Sitemap and robots file: Slightly technical but worth mentioning: a sitemap.xml is a file listing all your site’s pages. Many CMS generate this automatically (e.g. yoursite.com/sitemap.xml). Submitting this to Google Search Console (a free Google tool where you can inform Google about your site and monitor its search presence) can help Google discover all your pages faster. A robots.txt file instructs search engine bots which pages to crawl or not; the default is usually fine (just ensure you’re not accidentally blocking important pages). If using a platform like WordPress, SEO plugins (like Yoast SEO or RankMath) can handle sitemaps and such easily. If using a site builder, check their docs, often they either auto-submit your site or give guidance.
- Backlinks and external promotion: On-page SEO (your site’s own content) is within your control, but another huge factor is backlinks, other websites linking to your site. Quality backlinks act like “votes” that your site is authoritative or valuable. Earning backlinks can be done through content marketing (writing great blog posts that others reference), reaching out to local or industry directories to list your site, partnering with other businesses for cross-promotion, or being active in communities (without spamming your link). For a local business, getting listed on Google Business Profile, Yelp, and local directories is crucial (though those are citations slightly different from backlinks, but still important for local SEO). For a blog, maybe doing guest posts on other blogs with a link back can help. While you likely won’t focus on backlinks initially when just building the site, keep in mind that part of SEO is also off-site. As you launch, you can start thinking about how to get your site mentioned or linked in the right places.
- Content freshness and quality: Google’s algorithms prioritize helpful, people-first content. This means you should focus on creating pages and articles that genuinely provide value to readers, rather than trying to game the system. Regularly updating your site (adding blog posts, updating info on pages) can signal that it’s active and relevant. Following Google’s E-E-A-T guidelines is also wise. Demonstrate Experience, Expertise, Authoritativeness, and Trustworthiness in your content. For example, an expert author writing an article on a medical site (and having a bio that establishes credentials) is more likely to rank than an anonymous piece with questionable info. On your site, you can improve E-E-A-T by adding an About the Author section on blog posts, citing sources for facts (if you mention stats or studies, link to them), showcasing testimonials or case studies (experience), and generally ensuring accuracy and transparency in what you present.
SEO is a marathon, not a sprint. Don’t be discouraged if your site doesn’t show up on page 1 of Google for your target terms within days or weeks. It can take time for a new site to be indexed and to build authority. But by following the basics above, you’re setting a strong foundation. Meanwhile, you can promote your site through other channels (social media, email marketing, word of mouth) to start getting traffic and maybe some initial backlinks.
There is much more to SEO (like technical SEO issues, schema markup, etc.), but the above covers the 80/20, the most important 20% of actions that give 80% of the benefit for a new site. If SEO isn’t your forte and you have budget, you could consider hiring an SEO expert but for a small site just starting, do the basics and grow from there.
7. Test Your Website Thoroughly and Launch

You’ve built your website’s pages, added content, images, and set up the backend stuff like domain, hosting, and perhaps some SEO settings. It’s almost time to publish your site for the world to see. But before you hit that “Launch” or “Publish” button, take time to test everything thoroughly. A sloppy launch can create a poor first impression or even drive away potential visitors if things are broken.
Here’s a pre-launch checklist to ensure your site is ready:
- Proofread all text: Go through every page and read the content word by word. Check for typos, grammatical errors, or placeholder text you might have forgotten to replace (e.g., make sure there’s no lingering “Lorem ipsum” dummy text from a template!). Ensure consistency in things like capitalization, usage of terms, and tone. It can help to have another person review the content too, they might catch mistakes you overlooked.
- Test all links and buttons: Click every menu link, every button, and every hyperlink in the text. Do they go to the correct page? It’s easy to mistype a URL or have a link pointing to an old placeholder page that you renamed. Nothing is more frustrating to a user than clicking a link and getting a 404 error (page not found) or being taken to the wrong place. Also test social media icons, do they open your correct profile pages? Test email links or contact form submissions to ensure they reach you.
- Forms and interactive elements: If you have a contact form, submit a test message through it and see if you receive it. If you have a signup form for a newsletter, try signing up and see if it adds the email to your list (and triggers any welcome email if set). For ecommerce sites, do a test transaction if possible (most platforms allow creating a test product priced at $1 or using a sandbox mode for payments). The goal is to ensure the user flow works smoothly: e.g., a customer can add to cart, proceed to checkout, and get a confirmation.
- Cross-browser testing: Not all browsers render sites exactly the same. The major ones are Chrome, Firefox, Safari, and Bing. Your site will likely be fine if you use standard templates, but it’s wise to open it in a couple of different browsers (and devices). For example, Safari on an iPhone, Chrome on an Android phone, Firefox on a Windows PC, etc. Look for any weird formatting or layout bugs. Pay attention to fonts (do they load correctly everywhere?), alignment of sections, etc. If something is off in a particular browser, it might be due to a CSS quirk or a script not fully compatible. You may need a developer’s help for advanced fixes, but at least you’ll be aware. Most often, modern site builders ensure cross-browser compatibility, so this is just a sanity check.
- Mobile responsiveness: By now, you probably have already been checking mobile view but do a final thorough run on an actual phone and tablet if possible. Navigate through every page on mobile. Is the menu easy to use (e.g., a hamburger icon that opens a mobile nav)? Are the buttons large enough to tap without zooming? Is any text too small or cut off? Many site platforms let you adjust some mobile-specific settings (like using a different image or hiding certain sections on mobile). Tweak those as needed for a seamless mobile experience.
- Page speed and performance: We touched on optimization in SEO, but before launch, run your site through a speed test tool like Google PageSpeed Insights or GTmetrix. See if there are any glaring issues slowing it down. For instance, maybe one image is still huge and needs compression, or a script is taking long to load. Aim for at least a decent performance score or load time under a couple of seconds on desktop and not much more on mobile. If you find issues, fix what you can now, or note them down to address soon after launch. Sometimes installing a caching plugin (for WordPress) or enabling built-in performance settings on your host can make a big difference.
- Security checks: Ensure that your site is secure. By this point, you should have SSL enabled (test by browsing to https://yourdomain and see that padlock). If any “mixed content” warnings appear (meaning some resources are loading via http), you’ll need to correct those (often by updating URLs in the site or enabling a “force HTTPS” option). Also, if you created default login credentials during setup (for WordPress, the admin user), make sure you have a strong password set. Delete any sample content that came with templates (sample posts, admin accounts, etc.). Basically, don’t launch with any obvious security holes.
- Analytics and tracking: If you plan to use any analytics (like Google Analytics to track visitors) or Meta Pixel or similar marketing tags, set them up now and ensure they are firing. For Google Analytics, you’d add a tracking code or use a plugin; then you can use Google’s realtime report to see if your own visit is counted. It’s easier to implement these before launch rather than later (so you don’t miss initial traffic data).
- Get feedback: An optional but useful step is to have a few trusted people do a beta test of your site. Share the site (if it’s not publicly accessible yet, maybe publish it at a temporary domain or use a staging link if available) with a friend or colleague. Ask them to go through it as if they were a first-time visitor, and then give you feedback. Fresh eyes can spot confusing bits of navigation, unclear copy, or missing info that you, as the creator, might not realize (because you’re too close to it). They might say, “I expected to see pricing info on the Services page, but didn’t,” or “The contact form was a bit hard to find.” This insight is invaluable and can help you refine before the big launch.
- Final polish: Remove any elements that are not needed or placeholders. For example, if the template had a section “Our Team” and you don’t have team members to list yet, either fill it in or remove that section entirely. Or if you intended to add a promo video but haven’t made it, don’t leave an empty video block; either remove it or put a “Coming soon” note if appropriate (though generally better to remove empty stuff). Check the overall design for consistency one last time, same style of images used, spacing looks even, brand colors applied where needed, etc.
Once you’re satisfied that everything looks good and works correctly, it’s time to launch! On many site builders, this means hitting a Publish button (and possibly choosing your domain). On a self-hosted site, it might simply mean the site is already live, but you have removed any “maintenance mode” plugin or placeholder homepage you had.
After launching, here are a few immediate to-dos:
- Do a quick check on Google: Search your brand name or site name. Initially, it might not appear if it’s new (or Google might only have a placeholder result from the domain registration). You can manually submit your site to Google via Search Console (by requesting indexing of your homepage URL). Within a few days, you should see your site’s name come up. If you search “site: yourdomain.com”, Google will show all pages it has indexed for your site, useful to verify it’s seeing everything.
- Announce your site: Share the news on your social media, personal networks, or any launch announcement channels. If it’s a business, update your email signature to include the website. If you have clients or friends who were waiting on the site, send them a note. You might also consider a small launch promotion like a discount code (for an online store) or a special blog post, depending on your scenario.
- Don’t panic if something goes wrong: Often, after launch, you might notice a minor issue (“oh no, that image isn’t loading on the live site”), maybe a path was wrong or something only visible after full deployment. Stay calm; almost everything is fixable. In the early days, traffic is low, so you can correct things on the fly. Unlike a printed brochure, a website can be edited at any time. Early in this guide, we said, “Done is better than perfect.” That applies here. It’s better to get the site out there than to delay endlessly chasing perfection. As long as you followed the checklist and nothing mission-critical is broken, it’s fine to launch. You can (and will) continue improving the site as it runs.
Launching a website is an exciting milestone! Pat yourself on the back for all the work that led here. But remember, a website is never truly “finished”; the web and user expectations evolve, and your business or project might evolve too. This leads us to the final section: how to maintain and grow your website after launch.
Running a website is an ongoing journey. The good news is that if you set it up right initially (by following this guide), the maintenance is not too burdensome, mostly periodic check-ins and updates. And the growth activities can be scaled to the time and resources you have. Even a little effort each week to add content or engage online can compound into significant traffic and business over time.
Remember, your website is often the first impression someone has of your business or project. By keeping it updated, relevant, and user-friendly, you ensure that the first impression is a great one. Over time, a well-maintained site can become a powerful asset, bringing in new leads, sales, fans, or whatever conversion you aim for, even while you sleep.
Finally, don’t be afraid to seek help. There are communities of small business owners and webmasters (like forums, Facebook/Reddit groups, etc.) where you can ask questions and learn from others’ experiences. And if you're ready to build a site that truly works for your business, whether you're starting from scratch or want a complete website done for you, our team at Ramonda Digital is here to help. From modern, high-performing websites to full strategy and launch support, we’ve got your back.
Your site’s launch is just the beginning. Nurture it, and it will nurture your business or goals in return.


